I’ve been looking for the best way to get the last 11 years of marriage, babies and family life photos organized and put together in a way that is cute, easy and not too spendy. I am no where near an expert in this field, BUT my sister is and lucky me — she just came to stay a week!
I’ve done the photo books at Shutterfly before and I like to try and work on them on an ongoing basis so when a sale comes along I am ready to print off my book – but to be honest, although they are nice (and I do love the ones I’ve gotten) I really love the look of the crafty scrapbooks I used to make years ago when kids climbing on the counter and wanting to play with all my “stuff” wasn’t an issue – not to mention the space and money it was costing me.
During my last TWO cross country moves in the last 3 years – I’ve pretty much gotten rid of all my scrapbooking supplies, because it just didn’t work for me. I’ve wondered about digital scrapbooking, but really I didn’t know where to start – especially doing it on a fairly minimal budget.
There are plenty of fantastic blogs out there that will teach you the ins and outs of digital scrapbooking – but I needed the step BEFORE that step. Really and truly, how and where do I start?!!! So that is the point of view I am sharing from.
Step 1 – Get all your pictures in one place. I’ve done a pretty decent job in keeping mine together and filed by the date, so that wasn’t a huge project. I make my photo books to cover about 1 year at a time or a series of trips through the summer (I have one dedicated to all of our Christmases and we set it by the tree in December) – but they are a little scattered. I decided though that I want EVERYTHING in one place (before I had a few cd’s filed away, most of the pictures were on my computer and a few chunks on my honey’s computer) – but I wanted a “It’s all in one place, room for pictures I’ll take for the next 50 years” kind of solution. I chose to get an external hard drive – 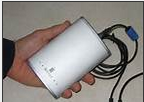
Step 2 – Get a good Scrapbooking Program. Now this is going to sound really pathetic, but I didn’t even know they existed! I know you can use programs like adobe photoshop but it is a lot of work to learn the program well enough to really make a cute book – and I am just not at the stage where I can spend the time on it. (So here I go copying my sister again – she’s a deal shopper too!) So I downloaded the FREEBIE version from My Memories.
-Click on “Software” at the top of the My Memories page.
-Choose “My Memory Suites” from the left side of the screen.
-Scroll down the page and on the right side you will see TRY IT FREE.
NOW the downside to the freebie version is you can only create scrapbook pages – you cannot export the pages to a store like Costco to print them off – or send them over to Shutterfly and print them in a bound book there – or even print them on your computer. So why the heck would you want the freebie? Download the freebie and start creating your pages NOW and then when it goes on sale (a few times a year) for as low as $15 (it did on Cyber Monday), and you are ready to snag it.
(If you just can’t wait for a sale – click on the link below to get it for $39.97)
Once you’ve paid, you can now send pictures to Costco, Walgreens or wherever you like to print your photos (not all stores print the 12X12 size – Costco does) to be printed for about $.50 per page and put them in your own scrapbook OR you can load each page as just 1 picture to Shutterfly during a sale and get the bound book – or print on your own printer. THIS PROGRAM IS EASY ENOUGH TO LEARN PRETTY QUICKLY IF YOU ARE FAIRLY COMPUTER LITERATE – as in you follow blogs, maybe have a personal blog and understand the basics of excel or word. If you follow Utah Sweet Savings – I will be sure to let you know when I see the full program go on sale – as I am using the freebie version right now.
Step 3 – How do I get all the cute stuff – for a good price?! – Well seriously – if you are going to go to the work of making your own cute scrapbooks – they should have all the cute trimmings, right?! My favorite part about the digital aspect here is that once you get a fun embellishment or a fabulous paper – it is yours to use over and over and over and over (you get the picture?) and over again! Your freebie program from My Memories will come with a few basics (and some of them are pretty cool) but there are TONS of freebies you can find along the way. I would start right on My Memories – click on “Free Kits” on the left side and just start shopping – for free! Once you get through those head over to the blog trains I just posted about. I will be watching for more of those, so I will post them on Utah Sweet Savings as I find them. The idea is that 10 or so designers each make a few items around one theme. You start at the first blog, grab the freebies they created and then they send you on the next stop. It is also a great way to become familiar with the different designers. You’ll find a few that you just love – take a look through their blog – if you find a kit you absolutely fall in love with you can grab those for just a few bucks and they are usually a pretty good sized pack. Remember, once you buy something and download it – it is yours to use as many times as you want!
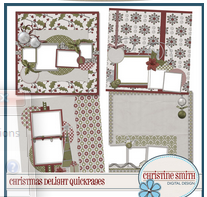
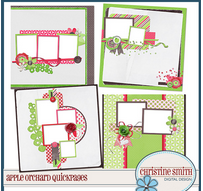
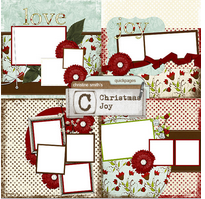
When I first started collecting goodies I went a little nuts and got everything I saw. I realized though that there are SO many creative designers that will include plenty of basics in their kits that you really don’t need to. Grab what you like, but don’t feel like you have to grab it all. One of my favorites I found (my sister pointed me at this one too) was the sale going on at Christine Smith – she has some beautiful items to scrapbook with and sadly she is no longer designing – so she has pretty much everything in her store 30% off. One FANTASTIC option that I found (for anyone really wanting to jump in) was that you can buy her ENTIRE store (it’s over $300 worth of products) for $30!!! (Details here.) Make sure you look through her collections though and make sure they are a style you will love – I know I fell in love with over 1/2 of her store, so it was well worth the $30 to me. All the photos at the beginning of this post are items I bought from her store.
So there is my crash course on getting started with Digital Scrapbooking. 1 – Organize your photos. 2 – Get your program. 3 – Start collecting a few freebies and find your favorite designers to add to your collection. As you start actually making your pages if you get stuck, My Memories has some great tutorials on youtube to help you with the details.
Oh – and one last concern I had was how “cute” my books would be if they weren’t really 3D. With all the little things you can do in the My Memories program like adding shadows, beveling your letters, and super awesome embellishments from the designers, you can really give your page a 3D look, without the 3D thickness to your book – so I am totally loving this style! You can also print your page several times if it is going to go in more than one book (ie. brag book for the grandparents, the family scrapbook, the baby book and Christmas book). My sister still does a few traditional pages in hers mixed in with the digital pages, so you don’t have to commit to just one style.



Lorraine thanks for posting this! I need to tackle all of my pictures and get books done. I am not good at it, I don’t know where to start so this will help me. It’s on my things to do in the summer if everything goes as planned.
[…] I just started Digital Scrapbooking and it is so easy to get a book from one of these sales! Scrapbook your pages as time permits – then when a sale like this comes along you load each full page that you scrapbooked as ONE photo to your photobooks. It will only take a few minutes to get your book ready during a sale like this one. […]
[…] In honor of National Scrapbook Day you can get a nice deal on the My Memories Suite 4 Digital Scrapbooking Program. Right now it is 25% off and you get a free photobook with your purchase – which bring the program down to $29.99. If you’ve already downloaded the freebie version and are ready to get the official version so you can start printing out pages. If you are unfamiliar with digital scrapbooking you can check out some intro info here. […]